Thursday, September 5, 2013

Pinterest All-Star Crock Pot Shredded Buffalo Chicken Sliders w/Bleu Cheese Broccoli Slaw


People, today is the official kick-off to football season. And the unofficial kick-off of everything buffalo chicken flavored. And no two things could make a fat Claud happier!

As my loyal blog readers know (Ryan. Dad. I'm looking in your direction), I became obsessed with football last year when I was invited to join a fantasy football league. I became such a rabid fan, I dumped Ryan one Sunday afternoon to go watch (by myself) the Patriots game that was not being televised. Also known as, the infamous afternoon when I was banned from the local pizza place -for what I swear- was no big deal. Just a little friendly banter between rival fans. Ryan on the other hand, has a much different version of that story. But what can I say, Ryan just has a skewed perception of reality. I say tomato, he says toh-ma-toe. 

As for my obsession with anything buffalo chicken flavored, I love it all. And I don't think I'm alone here. It's like all things fried. Who is not a fan of all things fried? Seriously, most anything can be fried and be good. Fried chicken? Good! Fried Cheesecake? Good! Fried Bacon? Damn GOOD!!! I rest my case. All things fried and all things buffalo are good. But, Enough about my obsessions and more about this sandwich.

People, this recipe is a no brainer. Literally. You throw chicken breast, buffalo wing sauce, butter, and an envelope of ranch dressing in the crock pot and 6-7 hours later, voila! You have a delicious meal that feeds a crowd and took almost no effort on your part. And the slaw, can be made in 10 minutes! So easy! The chicken was moist & tender. The sauce had that delicious buffalo flavor you love, but with a little extra something savory from the ranch dressing mix. And the slaw, well, the slaw was REALLY good and added that much needed freshness to the sandwhich. It was crisp and creamy and bleu cheesy -but not over powering bleu cheesy. It was the perfect balance cool and spicy!

I put all of the ingredients in the crock pot last night. Woke up this morning shredded the chicken with two forks -which was totally unnecessary because it fell apart as soon as I touched it. I made the slaw while drinking my morning coffee and then Ryan was on his merry way with "his" contribution to the office tailgate party. And people, it was a hit! Ryan texted me and said we "had to bring this tailgating with us." And for the effort and the awesome taste how could we not. I will more than likely be making this a few times this season. Try it, you won't be sorry. This is perfect for those Thursday night/Monday night games, when you want the game day food, but are too exhausted after work to put forth the effort. 

Now get out there and give it 110%! And God bless "Don't Stop Believing!" Who finished the 2012 season with 11 wins, 2 losses, and the hottest coach in Fantasy Football! Well, the latter is debatable, but the record speaks for itself! You ladies were OWNED!

Pinterest All-Star Slow Cooker Buffalo Chicken* Sliders w/Bleu Cheese Broccoli Slaw
Chicken via Emily Bites and Slaw adapted from Supper For a Steal

Ingredients
4 boneless skinless chicken breast
1-12 oz bottle Franks Red Hot Original
4 Tbspn Butter (divided)
1 Envelope Hidden Valley Ranch Mix
Bleu Cheese Broccoli Slaw (see recipe below)

Turn Crock-Pot on low. In this order place chicken, sauce, butter, and mix in Crock Pot. Cover and cook for 6-7 hours on low. Uncover and shred chicken with two forks. Taste sauce. If it's too spicy add another 4 Tbspns of butter, this will cut down the spice. *If you feel it will make it too salty, use unsalted butter. Spoon mixture into slider buns and top with Broccoli Slaw.

Bleu Cheese Broccoli Slaw

Ingredients
1 -12oz package of Rainbow Slaw (broccoli, cauliflower, carrots, red cabbage) -in the produce section of grocery store
1/2 cup sour cream
1/2 Bob's Big Boy Bleu Cheese Dressing
4 oz Bleu Cheese Crumbles
4 green onions (green & white parts) cut on a bias

Mix all ingredients until combined and chill for an hour or until ready to use. Top sliders with cooled slaw.

*The "Pinterest All-Star" refers to the Slow Cooker Buffalo Chicken.

Friday, May 24, 2013

Pinterest All-Star Reese's Peanut Butter Banana Bread


As many of you know, when it comes to Ryan's eating habits he can be a little... what's the word... ah! Yes! Par-ti-cu-lar. Add bananas to the list of what Ryan is "particular" about. Mr. Particular will only consume bananas at their optimum: right before they are ripe and not a second before or after they reach the "right before they're ripe" stage. Meaning, if they are a little too green or a little too yellow it's just a "little too much" of something for Mr. Particular to consume. So, what does this mean for me? Well it means two things. One, I have a clear 24 hour window (if I'm lucky) in which Ryan will consume bananas. And two, it is up to me to figure out what to do with over two pounds of bananas once that window closes.

I know what you're thinking, Claud, why don't you eat the bananas? Well, because, while I'm not very particular when it comes to food, there are a couple of things I dislike and a handful of things I will just not do. For example, goat cheese. I don't do goat cheese. As Paula Deen so eloquently likes to say "I'd sooner eat shit and die" before I'd eat goat cheese. Goat cheese tastes like a little something I like to call "farm farm." Farm Farm is that unique flavor you get when you walk out to the barn during the high heat of summer, get down on all fours,  and lick the bottom of the barn yard floor. That's what "farm farm" is and that's what goat cheese tastes like.

As far as bananas are concerned, I do "do" bananas. They're not my favorite so I am a little particular about how I like to eat them. I like them green and only eat them when they're green. I'll take one for the team from time to time and eat them ripe if I have to (unlike goat cheese), but I don't like it. So there you have it. Claud won't eat them ripe and Ryan will only eat them after they have been gingerly touched by the hand of God -not a second before and not a second after. So, what is a desperate housewife to do? Make bread of course! And how do I get Ryan to eat it? Put Reese's Peanut Buttercups in it! They're his favorite.

This bread was very delicious! Really moist, peanut buttery, and best of all chocolatey! Don't worry, it's still very banana-ey (?) for those of you who LOVE banana bread. But the best part is it's easy to make! Now, the only thing I did differently is I used the Reeses Miniature Peanut Butter Cups instead of the Reese's Peanut Buttercup Minis. I quartered the peanut butter cups, but I think next time I would half them instead and use more of them. I also cooked it at a lower temperature, because I was using a dark coated pan and I ended up loosely tenting it half way through cooking because it was in danger of over browning. People, it was perfect! If you're afraid of baking, try this. I swear it's nearly foolproof.

What did Ryan think? Well... that man never ceases to amaze me. Here I thought he would be jumping over the moon for the bread, but he wasn't. I know Ryan isn't a Carbosaurus Rex like me, but heck it had his favorite candy in it, he should have been all over it. I should have known better. He found it strange. Strange in a dumbfounded kinda way. The mixture of flavors was too much for Ryan. It confused his palate. In his words, "It's peanut buttery, but banana at the same time... and chocolate... uh... I don't know... it's... strange."Once, he told me that it made perfect sense (well, perfect sense when it comes to Ryan) why he wasn't over the moon about it. That doesn't mean he didn't like it, he was just... well, dumbfounded.

Me, I still think this All-Star is a winner and a must try for all! I will write the recipe as I made it, but please click on "Cookies and Cups" for the original recipe. Her pictures are to die, unlike mine ;)

Update: I just had a brilliant idea! This would be perfect for using up that extra halloween candy! Seriously, people, it's like I tell Ryan all the time, "Heavy is the head. Heavy is the head..."

Pinterest All-Star Reese's Peanut Butter Banana Bread
by Cookies and Cups


Ingredients
3 very ripe bananas, mashed
1/2 cup peanut butter
1/4 cup Vegetable oil
1 egg
1/2 cup granulated sugar
1/4 cup brown sugar
1 1/2 cups of all purpose flour
1/2 tsp baking soda
1 1/2 tsp baking powder
1/2 tsp Kosher salt
15 Reese's Miniatures quartered or halved (as previously mentioned I would use more miniatures next time)

How to Make
Preheat oven to 325
  1. Grease your loaf pan (I used an 8 x 4 pan) with butter.
  2. In a medium bowl whisk together your flour, baking soda, baking powder and salt, set aside.
  3. In a large bowl stir together your bananas, peanut butter, oil, egg and sugars.
  4. Pour your dry ingredients into your wet ingredients and stir until just combined. Batter will be lumpy. DO NOT OVER-STIR***.
  5. Fold in your Reese’s Mini cups and spread batter into prepared pan.
  6. Bake for approx 1 hour or until toothpick inserted into center comes out clean.
  7. Let cool in pan for 10 minutes, then loosen the edges of the pan with a knife and remove from loaf pan, transferring bread to a cooling rack.
Notes
*If you notice the bread browning too fast, loosely tent it with foil. I did after 30 minutes. It was perfect!
**Also, some readers (from her blog) noticed that if you over-stirred the batter the texture would be crumbly, so make sure not to over-stir! I was deathly afraid of this so I only stirred until I could no longer see the white of the flour. It was not much. Don't be afraid, like I said before it turned out awesome!

P.S. Thanks Cookies and Cups for this great recipe!


Tuesday, April 2, 2013

Spring Is In Bloom Strawberry Pie

                       Click on image for a bigger picture. No fancy photoshop here, what you see is what you get!

Did you ever see the movie Waitress? It's about this gal who works in a diner and despite having the unbelievable gift of being a "pie genius," she also has the misfortune of being married to a real jerk. Anyway, this gal makes pies and names them based on her mood or whatever inspires them. For instance, "I Hate My Husband Pie" or "I Can't Have No Affair Because It's Wrong And Earl Will Kill Me Pie." Of all the things to pop into my head while placing the finishing touches on my pie, the movie Waitress did. So, as I placed the last edible pansy on the pie it struck me, "Spring Is Bloom Strawberry Pie!"

And really, doesn't the name and pie capture Spring? When I think of Spring I think of fresh strawberries and newly bloomed flowers. Growing up in Orange County, there was a small strawberry farm down the street from my aunt's house. And at the end of every season they would put up a sign that read, "Closed. Open Spring Nineteen-ninety-whatever." And I remember always thinking wow, that sounds so far away from now. And yet in a matter of a few months, it was Spring and the stand was open. And I would always think wow, I can't believe it's been that long. Isn't it funny, how when you're younger time seems to drag on, but as you get older time just seems to fly you by? I drove by that little farm the other day, looking forward to seeing that sign promising fresh strawberries come Spring and to my utter surprise and dismay the sign was not there. The stand was not there. The farm was gone. In its place I found trenching, wood framing, and a sign promising a new gated community. Not the Spring promise I was looking for, and as depressing as it was to see the farm go, isn't that really what Spring is about: new beginnings? Change? After all new doesn't always mean good, right? The farm is gone and another cookie cutter housing development is going up in Orange County, because really, there aren't enough of them all ready. But like everything in life, we can choose to see the good or the bad, and despite my little sarcastic comment, I choose to see the good. I see the housing market slowly coming back. I see people getting back to work. And in my mind I see those hard working farmers enjoying retirement somewhere tropical. I see the joy of a family owning their first home and building lasting memories. I choose to see the good side of new beginnings.

I know what you're thinking blah, blah, blah, tell us about the pie. So, I will. And I apologize for the detour, but you can't look forward without looking back. With that said, isn't this the prettiest strawberry pie you ever did see? And lucky for you it's the tastiest too! My friend Lisette's family celebrate Equinox and invited me over for dinner and crafts. They asked me to make dessert and I really wanted to bring something that looked and tasted like Spring. Immediately I thought about using edible flowers, and lucky for me Whole Foods had them in stock. Then it was onto deciding on a dessert. I wanted something fresh tasting. At first I thought about lemon bars, but then as I was driving to Whole Foods I saw the strawberry stand on the corner was open and decided there and then I'd make a strawberry pie. Decorating the pie in flowers was a bit of a gamble. I thought it looked pretty, but Ryan thought flowers on a pie were strange. I then thought, who asked Ryan? And decorated it with flowers anyway!

As for the pie itself, it really did highlight the freshness of the strawberries instead of overpowering the taste with a sickly sweet glaze as often is the case. This glaze was not too sweet and there wasn't too much of it, so the strawberries weren't drowning in it. I actually did eat a strawberry after I had dipped it in the glaze and it was amazing! I also used a pre-made 10" graham cracker crust pie shell because I wanted the strawberries distributed better. Originally I wasn't going to add any food coloring to the glaze because I wanted it to look "fresh" and not have that "fake look," if you know what I mean. But the glaze was pale and when I dipped one of the strawberries in it, it made the strawberry look anemic. So, I added the coloring a tiny bit at a time until it matched the color of the reddest strawberry I had. I also used about 2 1/2 little baskets (pints?) of strawberries and it was perfect. Do try this pie, it was simple, delicious, and gorgeous!

Oh, and P.S. this isn't a "pretty pie piece" kind of pie. It's a "messy mound pie piece" kind of pie, but really, aren't those the best?

Spring Is In Bloom Strawberry Pie
or Gommie's Mile-High Fresh Strawberry Pie from Out of The Nest, Into The Frying Pan

Ingredients
1 baked 9 inch pie shell (I used 10"graham cracker for better strawberry distribution)
2 1/2 boxes perfect strawberries
1/2 cup water
3 Tbspn cornstarch
1 cup sugar
Pinch salt
1 1/2 Tbspn lemon juice
1 Tbspn butter
Red Food Coloring (I used Wilton Icing Color in Red)
1 to 2 packages edible flowers (optional)

Clean and hull berries just before making pie. Set aside enough soft berries to make 1/2 cup of pulp and make pulp. Set the rest of the perfect berries on a paper towel to dry.
Add 1/2 cup water to the 1/2 cup mashed berries. Set aside.
[In a small sauce pan] Blend cornstarch and sugar. Add salt, lemon juice and butter. Add the mashed berries and mix and cook over a low fire until thick and clear. Add enough red coloring to make a brilliant crimson. Cool to lukewarm.
Carefully dip the whole perfect berries into the red glaze, then place the berries in a perfect "mosaic" pattern in the pie shell. Keep adding the berries that have been dipped in the glaze, piling the berries higher as you work toward the center.
Spoon the remaining glaze over the berries, filling the chinks (or the gaps between the pie shell and the berries. If the glaze is too thick, gently warm before glazing pie.)
Decorate with flowers, filling in the gaps and draping where needed. Blues, yellows, and oranges pop out the most.
Refrigerate until serving time, then remove flowers and top each slice with whipped cream.

Click on image for a bigger picture.
No fancy photoshop here, what you see is what you get!


Wednesday, February 6, 2013

Warm Blue Cheese, Bacon, and Garlic Dip


I've had this recipe in my recipe binder for like, no joke, six years and I just tried it for the first time this past year. What took me so long you ask? I don't know. But if I had made this years ago, I'd probably be 20 pounds heavier and in desperate need of a dip-tervention -it's that good! 

I've made this dip four times now, and every time I've made it there has been nothing left. And by "nothing left," I mean the bowl has been wiped clean every time! The first time I made it, the resident Cheese Fatty (Ryan) and I ate the ENTIRE thing in one sitting. True story. That night we didn't eat dinner, and to our shame, we didn't even care. To our further shame, we both wanted more dip. But that was nothing compared to Christmas dinner with the Cheese Fatty Family.

Christmas dinner was fast approaching; meaning it was cutting into our dip eating time. So Aunt Cheese Fatty said (in what I thought was a joke), "I say we put the remaining dip in the mashed potatoes." I laughed and said it would definitely punch them up on notch. Next thing I know Mama Cheese Fatty and Aunt Cheese Fatty are folding the dip into the potatoes! True. Cheese Fatty. Story! I didn't know whether to be stoked or to prepare for a stroke. It was like that one time Paula Deen made a cheeseburger using Krispy Kreme donuts for the buns. You didn't know what to think. Is this woman crazy? Or crazy smart? The jury is still out on Paula, but as far as the potatoes were concerned... I'm not gonna lie, they were pretty freakin' awesome! Props to Aunt Cheese Fatty for not wasting dip and for being resourceful!

Now for the recipe. I do a couple of things differently than the original recipe calls for. I will write the recipe as I make it, but then also include a link to the original recipe at the end. I use roasted garlic instead of fresh because I usually have some in my fridge, but fresh is just as good. I also don't sauté the garlic in the bacon fat, not because I think it's fatty, but rather because it's just one less thing to do. Lastly, I serve it with sourdough bread cubes, but the recipe also suggests pita chips or green apple slices. As we all know I'm a Carbosaurus Rex so naturally I prefer the bread, but next time I think I will also serve it with some Granny Smith apple slices. I think the apples would pair well with the blue cheese, and because you're not loading up on bread you can feel a little less guilty and load up on dip instead :) 

Warm Blue Cheese, Bacon, and Garlic Dip
Makes 2 cups
Ingredients
7 slices bacon cooked bacon, chopped
2 roasted garlic cloves, minced
8 ozs. cream cheese, softened
1/4 cup half-and-half
4 ozs. (1 cup) blue cheese, crumbled
2 tbls. chopped green onions
Optional Garnish: 1 additional slice of bacon crumbled, blue cheese crumbles, and chopped green onions.
Directions
1. Preheat oven to 350 degrees. Beat cream cheese until smooth. Add half-and-half and mix until combined. Stir in bacon, garlic, blue cheese, and green onions.

2. Transfer to a 2-cup ovenproof serving dish and cover with foil. Bake until thoroughly heated, about 30 minutes. Serve with sliced apples, toasted pita chips or French bread.
Note: The dip may be prepared one day in advance. Refrigerate or freeze. Bring to room temperature before baking. Also this fits perfectly in a 160z corning ware dish (just slightly bigger than a ramekin).

*P.S. I found the recipe on a random website a million years ago and to its credit it cited the original source "Stop and Smell the Rosemary; Recipes and Traditions to Remember" written by the Junior League of Houston. After I tried this recipe I said to myself any cookbook with this recipe in it is worth buying. So, I went on Amazon and bought it! People this book is worth every penny and has earned every award it has gotten. I can't wait to try & share more recipes from it. And if you try this recipe and like it, please buy the book, you won't regret it!


Wednesday, January 30, 2013

Pinterest All Star - Crescent Roll Bacon Jalapeño Poppers

The Pin

The Pin-test!
 

If you have not seen this Pin you are either blind or dead. This pin has been making the rounds on Pinterest for quite some time now and has recently seen a revival due in large part to Super Bowl Sunday. Or as many of us have come to know it Food-per Bowl Sunday! Good ol' Super Bowl Sunday, that other special time of the year when everything around that holiday centers around food. And let's face it, Super Bowl Sunday is as much a holiday now as St. Patricks Day and Cinco de Mayo. So, because this special holiday is just around the corner, and I know many of you are eager to try some Pinterest recipes, I decided to give this Pinterest All-Star a test run for you.

How should I put this.... Ryan and I were... not big fans. I know how could we not be: cream cheese! Bacon! Jalapeño! I know, stop yelling, let me explain. Okay, first off, I love -no, wait- I LURV crescent rolls and carbs in general, so this should have been a homerun for me. Ryan loves all things bacon, creamcheese, and jalapeño, so this should have been a homerun for him. So where did this go wrong?


For me, the dough was too sweet for the savory filling, it just didn't work. Also, there was not enough filling, which allowed the sweet dough to overpower the flavors in the tiny rolls. Another complaint was that the flavors didn't seem to have blended enough in the baking process. This wouldn't be such a big deal except this is a two-biter app. Meaning that sometimes you'd taste a trace of bacon here... a trace of jalapeño there... but because of the portions you'd almost never get both of the flavors at the same time. 


Anyway, I don't think I would give these a second try, only because I don't think if I increased the filling amount it would decrease the sweet taste of the dough. Should you try these? I say be my guest! If you LOVE crescent rolls, don't like things too spicy, or simply just like bacon, give it ago. They are easy to make, look fantastic, and smell just as great. If you do decide to try to these I recommend increasing the filling amount and maybe chopping up the bacon and jalapeños and mixing them into the cream cheese.


What did Ryan think you ask? Ryan will probably "blog" about his thoughts on his "comment blog" aka the comment section after this post. 


Pinterest All Star - Crescent Roll Bacon Jalapeño Poppers
Via Hello Hue


You will need::
 a can of Pillsbury Crescent doughabout
2 tablespoons of cream cheese (give or take, depending on how much you want to use)
1-2 fresh jalapeños
and about 3 strips of bacon (if you want... I always want bacon.)
These amounts make 16 poppers.


Oven pre-heated to 350 degrees F. 
  1. Chop the jalapeños into small pieces. Clean out the seeds. Don't stick your fingers in your eyes or mouth for the rest of the day.
  2. Cut the bacon into pieces and then cook it up. I usually cut it up first cuz then you have nice, neat pieces and it doesn't get too crumbly. Just watch it so it doesn't burn. Unless you like burnt bacon. But that's weird.
  3. Roll out your dough. It's perforated into triangles, but I cut each triangle in half with a pizza cutter and do one popper on each half. Does that make sense? Sorry I didn't take pictures of that part. You can do it without cutting the crescents in half, and they'll just be a little bigger than bite size (and then the recipe will yield 8 larger poppers).
  4. Layer a small dollop of cream cheese, a piece or two of jalapeño, and bacon. 
  5. Bring the corners of the dough together and twist them together at the top. Press the edges of the dough together so the insides don't gush out.
  6. Bake 10-15 minutes at 350 and munch away!


Thursday, February 2, 2012

Pinterest All Star - Creamy Grilled Chicken Piccata


You may also know this by it's incorrect caption "Ranch Chicken Pasta." That's how I first encountered it, and that's really the reason why I clicked on the picture too. My sister loves, loves, LOVES ranch dressing and I thought this would be right up her alley, but unfortunately for her -and fortunately for me- the caption was wrong and it was really a recipe for Creamy Grilled Chicken Piccata. Now, I don't think I need to mention how much I LOVE me a good chicken piccata, but I will anyway, because what's not to love? Tangy lemon juice and citrusy sauvignon blanc dancing a savory waltz around al dente spaghetti, while stopping now and again to mingle with tender pieces of chicken;seriously people, what's not to love? But, enough about me and my love affair with chicken piccata and more about this creamy grilled version.

To quote Ryan after his first bite, "This is really an ALL STAR!", and folks he's right. Let me break it down for you: First, the chicken. The marinade for the chicken is spot on; meaning, if you wanted to have a low carb delicious meal, you could just go ahead and have this delicous chicken with a salad and call it a day. Second, the sauce. The sauce is pretty freakin' good. I used heavy cream, because it only called for 1/2 a cup, but you could easily use Half and Half and have the same results. The sauce was really lemony, which was great because one of my concerns was that with the addition of the cream it would loose that tang that traditional chicken piccata has, but it didn't. It was tangy, creamy, and delicious. My only complaint on the sauce was that it dried up or thickened too fast, meaning it didn't stay very creamy. By the time we went in for seconds it was pretty dried up. But don't let that deter you from trying this recipe, because there is an easy fix. Just turn the pan back on low and add a splash or two of milk and stir. It will come right back to life and you can enjoy your seconds, as much as you enjoyed your firsts.

Overall, I really liked this recipe because it was easy to put together and extremely flavorful. You set the chicken to marianade the night before. Grill it when you get home while the pasta water is cooking. Throw all your sauce ingredients in a pan and voila, you got yourself and restaurant quality meal in no time! The recipe makes enough for two, if you serve a salad enough for three (allowing for seconds or generous portions of course).

Pinterest All Star - Creamy Grilled Chicken Piccata
via Plain Chicken

Ingredients

Chicken
Juice of 1 lemon (3Tbsp)
3 Tbsp olive oil
1 Tbsp minced garlic
1 tsp salt
1/4 tsp black pepper
1/2 tsp basil or oregano
2 boneless, skinless chicken breasts

Pasta
2 cups dried penne pasta
2 Tbsp butter
Juice of 2 lemons (6 Tbsp)
1 Tbsp minced garlic
1/2 cup half and half (or heavy cream)
2 tsp dried basil
2 Tbps capers
1/2 cup grated parmesan cheese

Directions

Chicken
Combine first 6 ingredients and mix well. Place chicken in a ziplock bag and pour marinade over chicken. Marinate overnight in the refrigerator. When ready, grill until done. Allow chicken to rest for a few minutes and then slice into strips to serve over pasta.

Pasta
While chicken is grilling. Cook pasta according to directions (10-12 minutes). Reserve 1/2 cup of pasta water and drain. In same sauce pan (or deep skillet), melt butter over medium heat. Whisk in garlic and lemon juice. Pour in half and half and whisk until hot. Add some salt and pepper to taste. Add the parmesan cheese, basil and capers, and heat until cheese is melted. Check the consistency of the sauce and add some of the reserved pasta water to loosen the sauce if necessary. Toss in pasta.

Serve in pasta bowls with grilled chicken on top. Sprinkle with more parmesan if desired.

Pin It


Friday, January 20, 2012

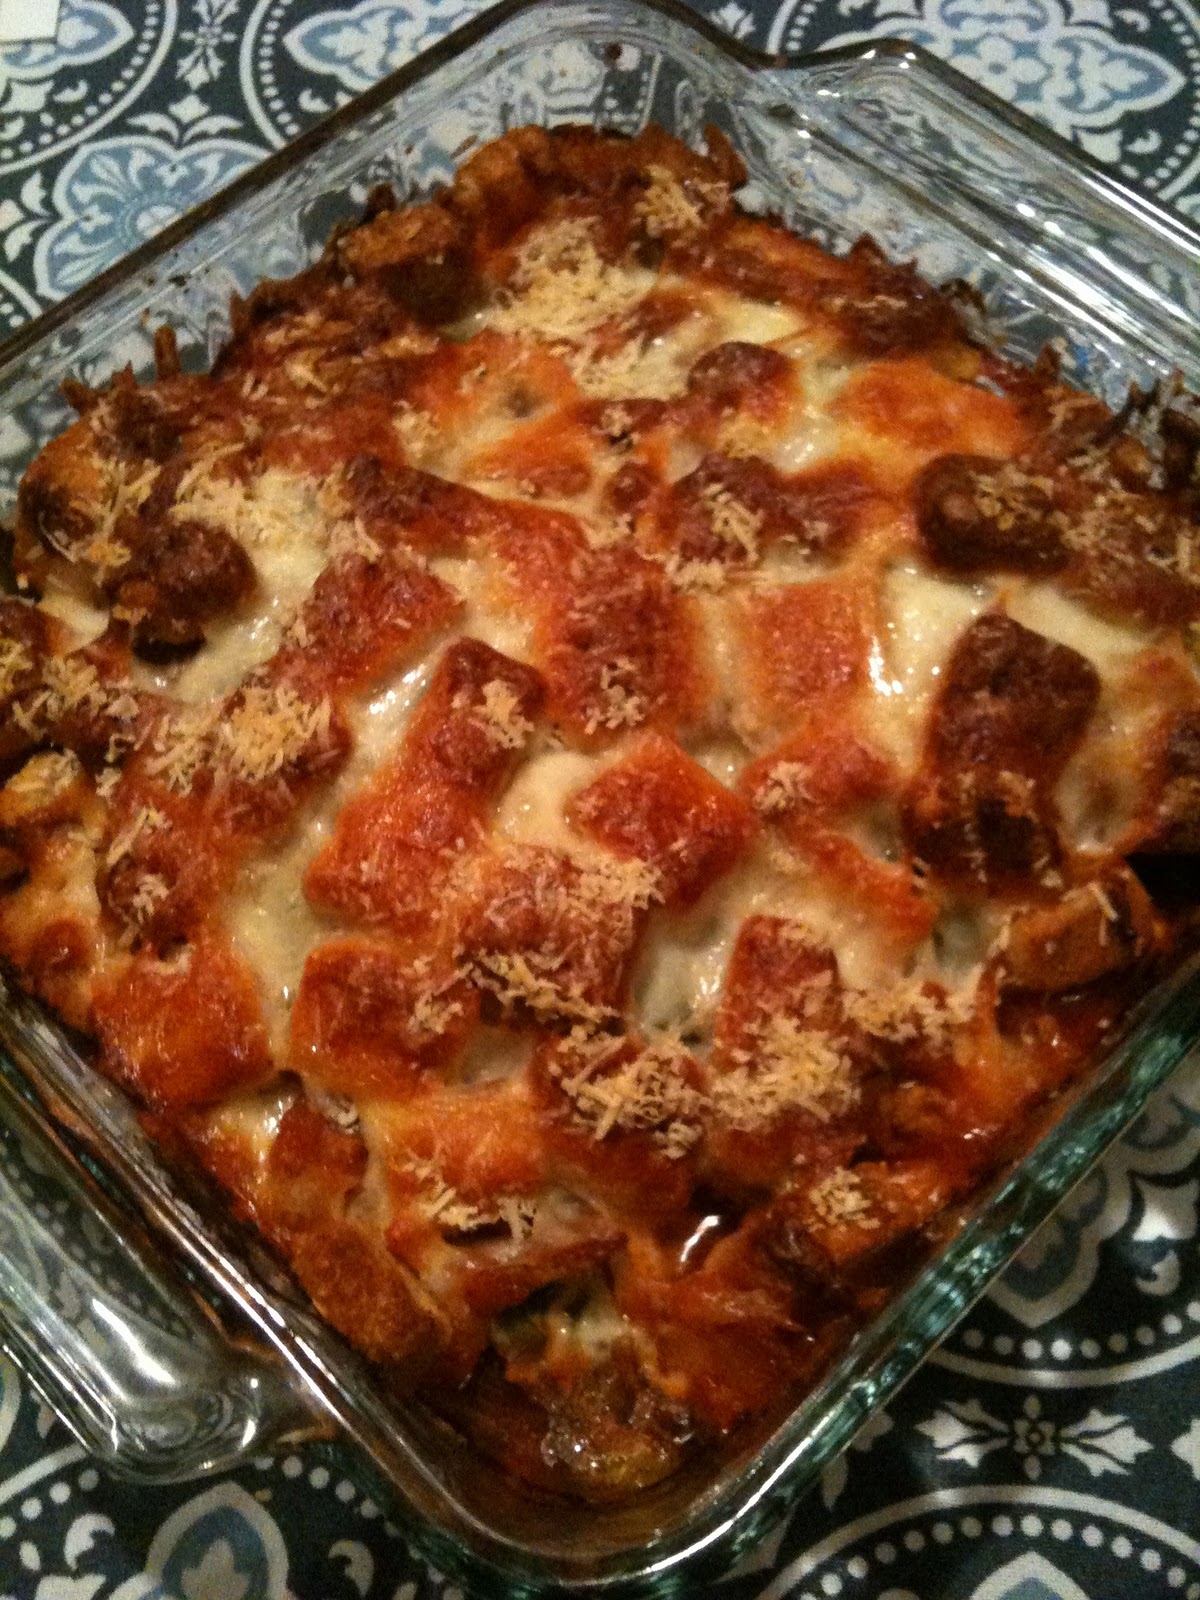
Pinterest All Star - Chicken Parmesan Bake; No Frying, Just Baking


Ya'll, let me just start off by saying how desperately I wanted this to be awesome. I mean let's think of Chicken Parm for a minute. The egg bathing, the flouring, the egg bathing, the breading, the frying, the on and on and on...right? And then here we have a recipe that would not only eliminate all that, but taste just as good, if not "better!" It was a no brainer, I had to try it, and I did. And when I pulled it out of the oven the promise of awesome was there too, I mean look at my picture. It looks just like the picture on the recipe. Side note: don't you just love when something turns out just like the picture? You get  such an overpowering sense of accomplishment it's silly. You can literally feel the gold star being placed on your forehead. But I digress.

First the good. The casserole was a good, easy, weekday home cooked meal. The sauce is delicious, and the dish is very cheesy; something Ryan, our resident Cheese Fatty, loved! It also came together in a snap, so that in 30-45 minutes a hot meal was on the table, which is pretty awesome. Second, it was a hearty casserole, which means you get more bang for your buck. Ryan and I usually have a chicken breast a piece, but this dish is made so hearty with all the cheese and the addition of the croutons that half a breast is more than enough. Lastly, I love that there's a video for the recipe. The narrator is funny and relatable, which makes up for the "not so good" below. 

Now, the not so good. It does not really taste like Chicken Parmesan. It tastes like a good italian style chicken casserole, which is a good thing, it's just not Chicken Parmesan. Ryan and I felt the croutons were too crouton-ey. They simply over powered the dish, and you literally felt like you were eating chicken topped with croutons, which is not a good thing. Which begs the million dollar question: would I make this again? Yes. Maybe not often, but if I wanted to put a hot meal on table fast without resorting to take out or my freezer I'd definitely make this. And I'll do you one better, I would recommend this casserole to friends that are self described "bad cooks". Not because they wouldn't know any better, but because it's a great starter casserole. And doesn't everyone, especially a novice cook, deserve a gold star on their forehead? I think so. With that said, I'll let you be the ultimate judge on this Pinterest All Star. 

Pinterest All Star -  Chicken Parmesan Bake;
No Frying, Just Baking!

Ingredients
 
2 tbsp olive oil 
2 cloves garlic, crushed 
hot red pepper flakes, to taste 
4 boneless skinless chicken breasts
2 cups marinara sauce (I used Classico Red Pepper)
1/4 cup chopped basil 
8 oz mozzarella, shredded 
4 oz Parmesan, grated 
1 (5-oz) package garlic croutons

How to

Tuesday, January 17, 2012

Pinterest All Star - Ham & Cheese Sliders


Cold ham and cheese sandwiches, borrrrrrrr-riiiiiiiiing. Warm ham and cheese sliders with a delicious onion mustard spread -A REV-A-LATION! First, excuse the picture this was before I placed them in the oven, and then I forgot to take a picture after I took them out. I know, a total FAIL on my part, but any picture is better than no picture. I've made these a couple of times and I really liked them. But seriously, with gooey cheese, tangy mustard, salty butter, and soft sweet onions, what's not to love about these?!?! And the best part is they come together pretty fast once the onion spread is done, which you can make ahead of time so it's ready when you are. My only complaint is they can be a little messy on the hands. Not from the cheese as you might suspect, but from the spread. Since you top the sandwiches with it, it gets all over your hands, which I didn't care for; however, they are worth getting messy over.

There are a couple of versions of this floating around Pinterest, but this is the version I like the best, mostly because it calls for mass assembly, meaning you construct all the sandwiches at once versus assembling each individually, which totally saves time.

A couple of words of advice:
  • Don't get overzealous with the cheese. It will take longer to melt and, dare I say, be in jeopardy of being too cheesy. I know, blasphemous. There can never be too much cheese; however, in this situation that just may be the case.
  • When cutting be very, very, very gentle, otherwise your little sliders will look like they got run over by a steam roller.
Other than that, these are worth a try. So go forth onto the world and try them!

Ham and Cheese Sliders

Ingredients
1 package of 12 Hawaiian Sweet Rolls
1 small onion minced
1 stick of butter
3 Tbspns Dijon mustard
2 tspns Worcestershire sauce
3 tspns poppy seeds (I finally broke down and bought them)
1/2 lb shaved ham
8 slices Swiss cheese (I would just do one even layer and call it a day)

Directions
Preheat oven to 350 degrees.
1. Melt butter in a small skillet and add onions. Combine mustard, Worcestershire sauce, and poppy seeds into onions and butter. Simmer for several minutes.
2. Slice rolls as a group length wise and place bottoms in an aluminum foil lined 13" x 9" pan.
3. Spread 3/4 of onion mixture on roll bottoms, followed by the ham and cheese slices.
4. Top with the roll tops. Spread the remaining onion mixture over the top. Cover with aluminum foil and refrigerate until ready to bake.
5. Bake covered with foil for 20 minutes.
6. Cool slightly, then cut along the bun lines. Serve warm.

Pin It

Monday, January 16, 2012

Hope everyone had a great weekend full of family, fun, and friends. I certainly did! I'll be back tomorrow with a new Pinterest All Star, hope to see you then!

xoxo,
Claudia

Friday, January 13, 2012

Pinterest All Star - Strawberry Margarita Jello Shots


Yes, that is a jello shot in a strawberry. No you are not imagining things, nor have you just died and gone to heaven -although I'm pretty sure they serve these in heaven. I'm gonna be honest with you guys these are pretty freakin' fantastic. They are very tasty. Like a margarita they are sweet and salty, and a little bit sour from the lime. There is no pesky paper cup to go through to get to the good stuff. And because there is no cup it also eliminates the unattractive process of sucking the very last bit out of the cup -that alone deserves an A++. And above all, they are cute. Which makes them appear harmless, so you can tell your friend that hardly drinks, "Dude, it's just a little strawberry you can have one." And then sit back and enjoy the show.

So that's the positive, now for the negative. They are a labor of love. And by labor of love I mean if you've given birth to a child, that is the kind of labor these require. The kind of labor that makes you curse your husband, cry for no reason, swear you'll never do it again, and then as your creation is completed and you reap your rewards, you forget all about how you said you'd never do it again. You forget that you nearly stabbed yourself in the process. You forget that you ate 10 failed attempts because you got overzealous with the coring. You forget that your shirt is still sticky from jello, and that your hair looks like you've been hit with a shovel. You forget all that and you say, "Hell yeah! I'm making these again!" They are that awesome people. That's why they serve them in heaven.

The only thing I did differently was I did not use Cointreau. And yes, it was because I didn't want to go out and buy it. I did however have peach schnapps so I used that. Yet another example of a calculated budgeting decision I had to make. Anyway, it's what I had on hand so I used it. And it was DELICIOUS!

Strawberry Margarita Jello Shots

Strawberry Prep

1. Cut the bottoms of the strawberry flat to get them to stand upright. When you do so, make sure that you do not cut off so much that there is a hole in the bottom.
2. Use a huller, apple corer, or melon baller to empty out the strawberry (I used the latter).
3. Check each strawberry and make sure there is not a hole in the bottom before you start filling. You can do this by holding it up to the light.

Ingredients

Margarita Mix

1 - 3oz Box Strawberry Jell-O
8 oz. Tequila
6 oz Cointreau or Peach Schnapps
1 cup hot water
1/4 cup cold water
Salt for Garnish
Lime for garnish

Instructions
1. Boil one cup of hot water in a saucepan, then add in Jell-O powder and whisk until powder is completely dissolved, about 2 minutes. Set aside.
2. Combine tequila and Cointreau, in cocktail shaker filled with ice. Add liquor mixture to cold water and stir to combine. Then add cold liquor mixture to hot Jell-O mixture and stir to combine.
3. Pour final Jell-O mix into strawberries and chill overnight. Take a wedge of lime and use it to moisten the edge of the strawberries, then dip and rotate strawberries in salt to rim. Garnish with cut lime triangles to finish.

Helpful Notes and Tips

  • Use the Jell-O brand mix and not a store brand. The store brands tend to not set up as firmly.
  • Choose the freshest strawberries you can find.
  • Poor mixture into a measuring cup with a spout, it made filling the little strawberries much easier!
  • Fill your strawberries as high as possible, as the Jell-O will sink a bit in the middle.
  • This recipe makes a ton, so I would recommend you have some of those little cups on hand just in case you give up. I am not ashamed to say I did. So I ended up putting the rest of the jello in ramekins. The cups would have been better.
  • The lime is optional, but in my opinion a must. The way we took the shooter was like a tequila shot. We popped the strawberry into our mouth and then sucked on the little lime wedge. You need that little sourness from the lime after the saltiness from salt and the sweetness from the jell-o and the strawberry, so take a moment to include it. You won't be sorry.
  • How to stand up those little devils. I lined them up like soldiers against the walls of my jelly roll pan. Jelly roll pan is the proper name for a baking sheet with sides, for those of you who didn't know. This worked well for me, but be careful when putting them into the fridge they are wobbly.
UPDATE: Thanks to my friend Lisette for thinking outside the box and suggesting standing up the strawberries in ice cube trays. Not only will it make it easier to fill and place in the refrigerator, it will also eliminate having to cut the bottom off. Brilliant!


Pin It

Thursday, January 12, 2012

Pinterest All Stars

If you read my previous post you are now acquainted with Pinterest. If you haven't read my previous post, shame on you. Go read it now, I'll wait. Done? Good, welcome back. I am happy to introduce a new section on my blog called Pinterest All Stars. Where I will feature recipes that have gone viral on Pinterest. Don't let the title fool you. The "All Stars" refers to it's viral status not to its delicious status, and I warn you they are not all worthy of their Pinterest All Star status. These recipes are home tested by your very own humble amateur cook, me :)

The first Pinterest All Star recipe is all ready posted (Bloomin' Onion Bread). Tomorrow I will feature another Pinterest All Star, stay tuned...

Pinterest All Star - Blooming Onion Bread


I found this recipe on Pinterest. If you haven't heard about Pinterest, boy are you missing out. It's basically Google Image search without all the viruses and penis shots. It's not a search engine though, it's a social networking site. Members on Pinterest post and save images, including the links that tell you where to find those images. Sometimes they're links to recipes, clothes, decor, or DIY tutorials, it really varies. But you can always find something that agrees with you. Go and explore for yourself you'll absolutely love it! But enough about Pinterest and more about this cheese marvel.

I found the Blooming Onion Bread on Pinterest one day, sitting among pictures of cute pugs and trendy wardrobe options. It was one of those images that kept getting "pinned" so I did a quick glance at the ingredients and, at the risk of sounding like Ina Garten, thought bread, cheese, and butter, how bad can that be? So I decided to try it. And it was bad. Really bad. But not the bad you're thinking. It was bad like that bad boy your mother warned you about. That kind of bad. The good kind of bad. And like that bad boy no one can resist, no one can resist her Cheesemagesty. That's what I've dubbed this creation, by the way. Why her Cheesemagesty you ask? Well, when you pull her out of the oven and gaze upon her melted cheese glory you will know why all mortals bow before her Cheesemagesty. Seriously! I have made this several times and no one can resist her, nor stop singing her praises. She is that awesome!

The best part of this recipe is its versatile. You can use any type of bread and cheese that strikes your fancy. The more creative you get the better the results. Our favorite combination is La Brea Bakery Rosemary Bread with Pepper jack Cheese, yum! The only thing I do different from the original recipe is to add a clove of mince garlic and omit the poppy seeds. I have nothing against poppy seeds, but I wasn't about to purchase them if they weren't an integral part of the recipe. You can call me cheap if you'd like, but I prefer to view it as calculated budgeting decision. The recipe below is written as I make it, follow the link below to see the original recipe. And without further ado I give you her Cheesemagesty!

Bloomin' Onion Bread aka Her Cheesemagesty

1 small La Brea Bakery Rosemary round or sourdough round
12-16 ounces Pepper Jack cheese, thinly sliced
1/2 cup butter, melted
1/2 cup finely diced green onion
1 large garlic clove minced

Directions:
Preheat oven to 350 degrees.

Cut the bread lengthwise and widthwise without cutting through the bottom crust. This can be a little tricky going the second way but the bread is very forgiving (this is very true).

Place on a foil-lined baking sheet. Insert cheese slices between cuts. Combine butter, onion, and garlic. Drizzle over bread. Wrap in foil; place on a baking sheet. Bake at 350 degrees for 15 minutes.
Unwrap the bread and bake 10 more minutes, or until cheese is melted.
Pin It

Monday, April 19, 2010

Veal / Chicken Piccata

El Veal


The Pollo

Why two versions? Short story; Ryan doesn't eat anything other than chicken -let me rephrase that- Ryan eats boneless skinless chicken breasts and meats that have been processed, formed into patties or stuffed into meat socks to become sausages -that's all Ryan eats. I know what you're thinking, "surely, he must eat [insert tasty type of meat here]" and the answer to that is no. Here's a quick break down of what you're thinking and what the answer is:

Steak? No.
Pork chops? Don't insult him.
Ground beef? You betcha!
Every hoof, snout, and anus scrapped off the slaughter house floor, ground up and stuffed into sausages? All. Day. Long!

And that is Ryan in a nutshell and why I cooked two meals. But enough about Ryan and more about this recipe.

This was a very good Piccata. I had tried Ina Garten's recipe for Chicken Piccata and I have to admit I didn't care for it. I tried it because the reviews indicated it was very lemony, and it was, but that's all it was. Needless to say I never made it again and had lost my hopes of making it at home when Dad happen to bring home some veal. Well what were we to do but cook up this politically incorrect, albeit tasty, politically incorrect meat. I tried both the veal and the chicken versions and I have to say I liked the chicken version better. I'm sure coating the chicken breast in bread crumbs didn't hurt, but overall the chicken won out. I pounded the chicken very very thinly. I cannot stress the "very very thinly'' part enough. I don't know about you but I can never pound a chicken breast with a meat mallet so I use a rolling pin and it works wonders with less effort. Make sure you place chicken between two pieces of parchment paper first -seriously, don't forget.

Anyway this recipe is going to be choppy because it's half Emeril half Claud, and when anything is half Claud it can get a little confusing. But give it a go you won't be sorry, below I wrote in both options chicken or veal. You can do both like I did, I used 3/4 pound of veal and 2 boneless skinless chicken breast. If you do this I recommend you cook the chicken first and then the veal. You will need to add oil as needed in order to have enough oil to brown the meat.

One last thing, don't worry about the crushed red pepper flakes overpowering the dish or making it spicy because it does neither. It's simply in the background acting as a cheerleader to the lemon -and it's one tasty cheerleader ;)

Veal / Chicken Piccata
Original recipe by Emeril Legasse

Veal
4 veal scallops, about 3/4 pound, pounded to a thickness of 1/8-inch
1/2 cup all purpose flour
1 1/2 teaspoons salt
1/2 teaspoon freshly ground black pepper
In a shallow bowl or plate combine the flour, salt and pepper and stir to combine thoroughly. Quickly dredge the veal scallops in the seasoned flour mixture, shaking to remove any excess flour.

Chicken
4 Boneless Skinless Chicken Breast pounded thinly a little over 1/8th of an inch
Italian breadcrumbs
2 eggs
Whisk eggs in a bowl. Dip chicken in egg mixture, and then coat in breadcrumbs.

Sauce:
1 1/2 tablespoons olive oil
5 tablespoons butter
1 cup dry white wine
1/2 cup chicken stock
2 garlic clove, chopped
1 lemon, juiced, or more to taste, (about 2 tablespoons)
3 tablespoon capers, drained
1 tablespoon chopped parsley leaves, optional, plus sprigs for garnish
1/2 teaspoon salt
2 pinches crushed red pepper flakes

Heat the oil in a large skillet over medium-high heat until very hot but not smoking. Add 1 1/2 tablespoons of the butter and, working quickly and in batches if necessary, cook the veal until golden brown on both sides, about 1 minute per side. For the chicken cook the chicken 3-4 minutes each side. Transfer to a plate, loosely tent with aluminum foil and set aside.

Deglaze the pan with wine and bring to a boil, scraping to remove any browned bits from the bottom of the pan. When the wine has reduced by half, add the chicken stock, chopped garlic, lemon juice and capers and cook for 5 minutes, or until the sauce has thickened slightly.

Whisk in 1/2 teaspoon of salt, remaining 3 1/2 tablespoons of butter, chopped parsley, and pepper flakes. When the butter has melted and the sauce has thickened, about 1 more minute, remove from heat. Plate the chicken, top with suace, and garnish with parsley sprigs, serve immediately.

Suggested serving companions: We had this with garlic mashed potatoes, which were very good. I usually have it with a side of plain spaghetti. I would highly recommend both.